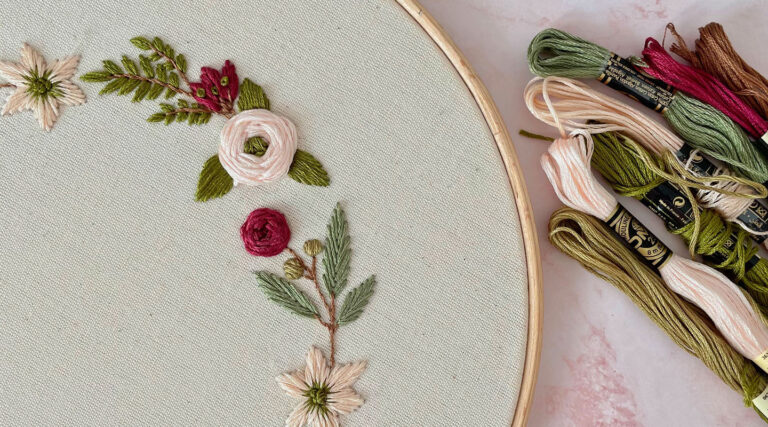

Embroidery can seem a bit intimidating at first, but once you get started, you’ll be surprised how easy it is to master the basics of embroidery. However, once you’ve mastered the basics, there’s plenty more to learn.
These advanced hand embroidery stitches allow you to create interesting effects and textures that will take your designs to the next level.
Eight advanced embroidery stitches
If you’re just starting out, or need a refresher, check out our guide to basic embroidery stitches. However, if you’re ready to jump straight in with more advanced-level stitches, take a look at the eight stitches below and really hone your technique.
1. Blanket stitch
Blanket stitch is so-named because it is traditionally used to edge blankets as a practical way to secure the edge and as an elegant finishing touch. It’s also an excellent stitch for embellishing appliques and patches instead of using a simple whip stitch.
To make a blanket stitch:
- Starting at the back, bring the needle through the fabric along the upper stitch line
- Push the needle in through to the back of the fabric on the lower stitch line and one stitch width to the right
- Bring the needle through to front of the fabric again on the upper stitch line, looping the thread under the needle
- Repeat steps 1-3, continually working to the right
This describes how to sew the blanket stitch from left to right, but you can apply the same steps right to left. If using the blanket stitch to edge two or more pieces of fabric, ensure the layers are well-secured with sewing pins before starting to work the stitch.
If you’re using this one to edge an applique, attach the piece first using a thin, two-sided fusible or per the manufacturer’s instructions. It can be a good idea to secure it further with a sewing pin or two, just in case.
You can also vary the length of the vertical stitch for an interesting effect, or work the blanket stitch in a pattern.
Watch this video tutorial for more details on how to do a blanket stitch.
2. Fishbone stitch
Although this versatile stitch looks rather like a fishbone, you can also work it to create leaves and feathers. It’s a filling stitch, which means it’s used to fill in shapes, usually with blocks of color.
To make fishbone stitch:
- With tailor’s chalk or pencil, draw the outline of your shape on the fabric then add a center line down the middle (this is optional but very helpful for making a consistent shape)
- Sew a small, straight stitch from the top directly down the centerline
- Bring your needle through to the front of the fabric, on the edge of the outline next to the first stitch, making a slanted stitch the finishes just over the centerline
- Do the same to the left of the first stitch, ending just below the slanted stitch on the opposite side of the centerline
- Continue making slanted stitches from the edge of the outline to just across the centerline, always alternating sides
You can work the stitches close together for a smooth, satin-like finish, which makes a stunning effect for leaves. Alternatively, space the stitches a little apart to create beautiful feathers, fishbones, or for a border stitch.
The stitch also looks quite different depending on the length of the stitches, and whether they’re symmetrical in length on each side.
Follow along with this video to try the fishbone stitch for yourself.
3. Bullion stitch
Also known as the bullion knot, this stitch is essentially an elongated knot that can be clustered together to create interesting motifs. The embossed nature of the stitch makes it awesome for adding texture or creating 3D embroidery.
To make bullion stitch:
- Pull the needle through to the front of the fabric and then to the back at a point below the first one a the length you want your final bullion stitch to be, without pulling the thread all the way through
- Bring the needle back through to the front of the fabric at the top of your first stitch, without feeding the needle all the way through
- Wind the working thread around the needle, stacking the wraps enough times that they’re the same length as the distance between the two points in Step 1
- Holding the wrapped thread, pull the needle and thread all the way through, until the wraps sit neatly on the fabric.
As you’re finalizing the stitch, you can adjust and straighten the wraps with your fingers to make sure they sit neatly.
For best results, use a milliners needle when doing bullion stitch. This kind of needle is the same thickness from end to end, making it easier to run the wound thread down the length of the needle.
If you’re more of a visual learner, you can watch the breakdown of how to do the bullion stitch in this video.
4. Colonial knot
This knot is an alternative to the French knot: the two knots look very similar, but are created differently. It’s really down to personal preference, so advanced sewists can try both and see which they prefer, though it’s usually a good idea to learn the French knot first – check out our guide to basic stitches for a breakdown of that stitch.
To make the colonial knot:
- Bring the needle through the to the front of the fabric and create an arc in the thread above the needle point
- Pull the needle through the arc in the thread
- Wrap the thread around the needle in the opposite direction towards the point of the needle, forming a loose figure eight
- Pull on the thread tail to tighten the figure eight around the needle
- Push the needle through the fabric to the back close to where you pulled the thread through in Step 1
- Pull the thread tight to form a knot on the front of the fabric
For small, neat knots, be sure to hold the looped thread close to the fabric as you pull the knot tight. Because the thread is twisted around the needle twice, the knot tends to stick up above the fabric more, making it more prominent than a French knot and creating an interesting texture.
If you’re still unsure, check out this video tutorial on the this stitch.
5. Pistil stitch
This is a variation of the French knot combined with a straight stitch, so make sure you’re confident with this basic stitch before you move on to the pistil stitch. Sometimes also called the long-tailed French knot, it’s so named because it’s reminiscent of a flower pistil, the central part of the flower.
To make pistil stitch:
- Bring your needle through to the front of the fabric, and pull your thread to a short distance from the first point
- Make a French knot at this point by wrapping the thread around the needle and pull the needle through to the back of the fabric at this point so that wrapped thread tightens around the needle
- Pull the thread all the way through while holding on to the thread wraps to keep the knot tight, to form a straight stitch with a French knot on one end
It’s important to use a small-eyed needle when working the pistil stitch – this will make it much easier to create an elegant finish.
Not surprisingly, the pistil stitch is excellent for making the center of flowers, but it also looks fantastic as petals, on borders and for forming fan-like motifs, or as a textured fill stitch. You can also vary the stitch by using a colonial knot on the end instead of a French knot.
Watch this video tutorial for a full demonstration of the pistil stitch.
6. Herringbone stitch
This is another stitch with two halves around a central stitch line, but, unlike some other symmetrical stitches, it has overlapping center threads. The overlapping criss-cross is uneven, crossing at quarters rather than exactly in the middle.
To make herringbone stitch:
- Draw two parallel stitch lines on your fabric with tailor’s chalk or pencil (again, this is optional)
- Bring the needle through to the front of the fabric on one end of the upper stitch line
- Pull the needle back through the fabric diagonally across from the first point on the bottom stitch line, and back through to the front slightly to the side of the first point
- Repeat the same in the other direction: pulling the thread through to the back diagonally across, and then to to the front slightly to the side, and towards the first point
- Continue to work this pattern, forming asymmetrical crosses that alternately closer to the lower stitch line and upper stitch line
You can achieve very different effects by either working this stitch in an open way, or placing the stitches close together. When the stitches are sewn close together, it’s ideal for making leaves of all sizes, as there are no gaps in the middle of the shape.
Either way, for a clean, polished finish, it’s important to keep the diagonal stitches parallel.
For a visual aid on the herringbone stitch, watch this video tutorial.
7. Fly stitch
Fly stitch is typically done on a small scale to create delicate borders or intricate details such as leaves, grass, flocks of birds. It can also be used as an interesting fill stitch that adds unexpected texture to tree trunks or greenery.
To make fly stitch:
- Bring the needle up from the back through the front of the fabric
- Pull the needle to the back of the fabric slightly to the side of the first point, and then back through to the front below and in between the first two points, sliding the needle over the thread as you come back through
- As you pull the thread tight, loop the working thread to create a V shape
- Bring the needle and thread through to the back of the fabric right underneath the loop to secure the V shape
Follow these steps to make a basic fly stitch which is in a V shape. You can also vary the form to a Y or U shape, or changing the stitch length, as well as playing with asymmetry.
Create Y-shaped fly stitch by lengthening the last stitch to form the stick of the Y. You can make it a U-shape by broadening and shortening the overall stitch.
Fly stitch looks fantastic sewn in a row of horizontal or vertical lines, for floral motifs, meadows, or bushes.
This video is a great resource for learning the fly stitch.
8. Padded satin stitch
This version of the satin stitch has a raised effect that will give your designs more texture. It is more time-consuming than the standard satin stitch, but it’s great for adding interest or variety.
To make padded satin stitch:
- Mark out (if you wish) and then stitch the outline of the shape you want to create using chain stitch, or any other basic stitch of your choosing
- Use a straight stitch or chain stitch to fill the inside of your shape: this doesn’t need to be neat or complete as this will be hidden by the finished stitches
- With satin stitch cover the whole shape, making sure to pull the needle through on the outside of the fill stitches
You can vary the height of this stitch by adding more or less padding at the base. You also achieve effects by completely filling the base or partially filling it, or by using different types of thread: a rounded, plump thread, for example, will give a stunning result.
The padded satin stitch is highly versatile: you can work it in virtually any shape, such as round, square, or leaf-shaped.
Watch this video tutorial to learn more about how to do the padded satin stitch.
Final thoughts
It’s true that you can create beautiful embroidery with just a handful of basic stitches. However, these advanced hand embroidery stitches will let you incorporate all kinds of textures and effects in your designs.
Whether you’re using the pistil stitch to make a life-like flower, or building a meadow with a row of fly stitches, these techniques can let you make pieces that are truly a work of art. You’ll also be able to play with 3D effects thanks to stitches like the colonial knot and the padded satin stitch.
Be sure to check out our guide to basic embroidery stitches, and for more inspiration, take out a look at our posts on the best free sewing patterns, or set up your perfect space with these sewing room ideas.