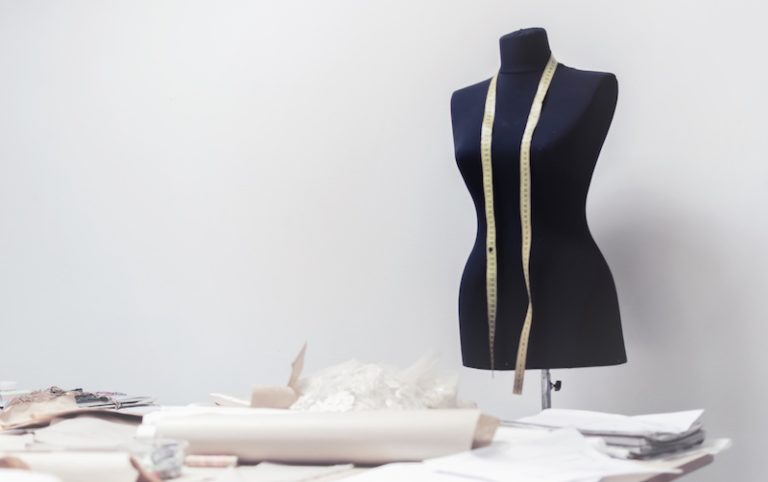

A dress form is essential for any garment sewist. Dress forms can be expensive to buy, but luckily there’s an affordable alternative: you can make your own!
In this tutorial, we’ll provide step-by-step instructions for three different ways to make your own DIY dress form.
DIY paper mache dress form
A paper mache dress form is one of the most precise dress forms you can make yourself, resulting in a very accurate model It should be acknowledged that DIY paper mache dress forms are a bit trickier and more expensive to make than some other DIY dress forms.
However, if you’re looking for accuracy, this is the way to go!
What you’ll need
To make a paper mache dress form, you’ll need:
- Plaster of Paris
- Paper pulp insulation
- Wallpaper paste
- Large mixing bowl
- Plastic/saran wrap
- Paper towels
- A hairdryer
- White (clear) glue
- Knit fabric
- Trash bag or form-fitting t-shirt
- A willing model
How to make a DIY paper mache dress from
Follow the steps below to make your very own, super accurate DIY paper mache dress form.
Step 1: Set up your workstation
Before starting to make your paper mache model, it important to set up and prepare your workstation.
This is a very messy and rather lengthy process. Accordingly, you need to ensure your model is in a comfortable position where they’ll be able to stand for a long time.
Your model should also wear a trash bag or t-shirt that will become the basis of your dress form. You should provide this for them, as you’ll be wrapping your plaster of Paris strips directly on top of their torso.
Make sure you warn your model that they will get a bit dirty, and protect their neck with plastic or saran wrap.
You’ll also want to cover the area where you’re working to protect surfaces and items from the messy paper mache process.
As the final step of preparation, wet your plaster of Paris strips and have them ready to wrap.
Step 2: Wrap your model’s torso
Next, start applying the plaster of Paris strips to your model’s torso. Start at the bottom and work your way to the top.
Begin wrapping your model’s torso form top to bottom, in a sideways direction and gradually working your way up. When you get to the top, make sure that your model’s neck is fully protected with plastic wrap.
Wrap the strips quite tightly around your model’s shape. You should also vary the size of the strips, placing larger strips on the stomach and shoulders smaller strips around the bust area – this will better fit around the curves of the bust.
Step 3: Repeat the wrapping process
Once you have covered your model’s entire torso, start from the bottom again. You want to repeat the process several times to achieve optimal thickness.
Keep working until the paper mache shape is thick enough – three or four layers is probably ideal.
Step 4: Cut the plaster off your model
Before the plaster of Paris strips have dried and your dress form is still damp enough to cut, you need to remove it from r your model.
Carefully cut down each side of the form and gently remove the form from your model. Set the two halves aside for the moment.
Step 5: Prepare the mache
Next, prepare the mache that you will use fill your dress form.
Mix the paper pulp insulation and wallpaper paste together in a large bowl. Mix well to form a smooth paste.
Step 6: Apply the mache to your mold
Lay out the two halves of your mold and line with paper towels. This prevents the paper mache from attaching to the mold.
Start applying paper mache inside the mold and on top of the paper towels, gradually building up layers. You want the two half molds to be pretty much full.
As you complete the layers, make sure that the edges are a little thicker, which will make it easier to join the two halves together.
Step 7: Stick the two halves together
Once the paper mache has dried (you can speed this up with a hairdryer), stick the two halves together to form a complete dress from.
Liberally apply glue to the two halves, making sure to put plenty of glue on the edges to ensure they hold together well.
To make sure the form dries shut, tie the mold together with cord. Keep an eye on the form as it dries, making sure that the cord does not loosen too much.
If the cord does begin to slack, slot some wooden splints under it to keep the two halves pressed firmly together.
Step 8: Finish your dress form
Once completely dry, remove the cord and the splints, if you used them. Wrap the dress form in fabric – we recommend a knit fabric that is perfect for pinning and draping garments.
You can finish the project by putting it on a stand – a microphone stand works well for this – and you’ll have a professional-looking dress form!
DIY duct tape dress form
If making a dress form for paper mache seems too tricky and time-consuming, we’ve got your back! This duct tape option is super-easy to make and pretty inexpensive.
With a few rolls of duct tape and some saran wrap, you’ll soon have your own DIY dress form.
What you’ll need:
To make a duct tape dress form, you’ll need:
- Rolls of duct tape
- Plastic/saran wrap
- Black marker pen
- Stuffing
- A long t-shirt
- A willing model
How to make a DIY duct tape dress form
Follow the simple steps below to make your own duct tape dress form.
Step 1: Prepare your model
Give your model a long t-shirt to wear. The shirt should be long enough that the bottom of the shirt sits somewhere around the mid-thigh on your model.
Note that you will be sticking the duct tape directly onto this shirt. Protect your model’s neck by covering it with saran or plastic wrap.
Have your model stand comfortably in a position they can stand for a while without moving. They should be relaxed but standing straight.
Step 2: Wrap the duct tape
Starting at the bottom of the t-shirt, wrap the duct tape around your model.
Wrap the tape in a crossways motion, so that it is fairly close to the body. However, the duct tape shouldn’t be so tight that it is squeezing your model.
You’ll need to be particularly careful not to wrap the tape too tight around the waist – remember, you’ll need to add extra layers!
As you work, adjust the t-shirt as necessary in order to follow the line of your model’s shape. This will likely be required around the bust and underarm, and using smaller pieces of tape around the bust can help to create smooth lines.
Step 3: Add more layers
Wrap your model’s torso completely from bottom to top including covering the top of the shoulders. When you get to the neck area, make sure that the plastic wrap is still in place so that you stick the tape to the wrap, rather than directly on to your model’s skin!
Wrap the duct tape around the neck and arms to create a fitted shape.
Once you’ve finished the first layer, start again at the bottom to add an additional layer. Keep layering until you’ve achieved a good thickness: three layers should be enough.
Step 4: Mark the Waistline
While your model is still wearing the t-shirt and duct tape, mark out their waistline with a black marker. This will help you later to finish the dress form correctly.
Step 5: Remove the form from your model
Take a sharp pair of scissors and gently make an opening in the middle of the back of the form. From there, cut down the back of the dress form, trying to make a straight line if possible.
As you cut, be careful not to snip your model’s clothes – or your model!
Step 6: Stuff your dress form
Once you have removed the duct tape form from your model, stick it back together with duct tape.
Stuff it with polyfill to keep the shape of the form intact. Using padded bra cups or shoulder pads can help to keep the shape of the bust. Line the bust area with a small amount of polyfill first, then place the bra cups or shoulder pads, and continue stuffing with polyfill.
You can set the form on your table or workstation or make a stand for it if you prefer.
DIY paper tape dress form
A paper tape dress form is another great option for a DIY form. This dress form is easy and relatively inexpensive to make. It results in a light form that is easy to move around – perfect for transporting to other locations!
What you’ll need
To make a DIY paper tape dress form, you’ll need:
- Brown paper tape
- Bowl of water
- Sponge
- Hairdryer
- Stuffing
- A form-fitting t-shirt or trash bag
- Plastic/saran wrap
- A willing model
How to make a DIY paper tape dress form
Here’s your step-by-step guide to making a dress form from brown paper tape. You’ll be able to find this kind of tape at most office supply stores.
Step 1: Position your model
Give your model a form-fitting t-shirt to wear or have them put on a trash bag. If you use a trash bag, use some duct tape to fit the bag to your model’s body so you can follow their shape.
If using a t-shirt, protect your model’s neck area with plastic or saran wrap.
Position your model in a relaxed, comfortable pose. They need to be able to stand comfortably with their back straight.
This process is a bit messy so make sure you are working in a suitable space.
Step 2: Wet the paper tape
Have your brown paper strips, a bowl of water and a sponge at the ready.
Moisten some strips of paper tape using a wet sponge. Do not prepare too many in advance, as they may dry out before you have a chance to apply them.
Step 3: Wrap the tape
Similar to the processes described above, wrap the moistened strips of paper tape around the model on top of the t-shirt, starting at the bottom.
Wrap the tape strips horizontally, working your way up. Once you come to the bust, skip this area for now and continue wrapping above the bust and towards the shoulders.
Step 4: Form the bust
Once you’ve wrapped below and above the chest area, moisten some smaller brown paper strips and use these to complete the bust. These small strips will sit more accurately around the curves of your model’s bust.
Finish by wrapping around the neck and arm, again using smaller strips to tackle these slightly tricky areas.
Step 5: Add more layers
Once you’ve covered the model’s entire torso, start from the bottom again with another layer.
Three or four layers is ideal, and you do not want to go above four layers, as otherwise this may distort the shape of your model’s form.
Step 6: Remove the form from your model
You’ll need to wait until the paper strips are fair dry before you can remove the form from your model. As your model is probably getting pretty tired of standing still at this stage, you can speed up the drying process with a hairdryer.
Carefully cut down the center of the back and remove the form from your model.
Step 7: Stuff your form
Once completely dry, tape the back of your form together again and stuff with polyfill.
Put it on a stand or simply stand your new dress form on a table or workspace!
Wrapping up
Whether you choose to make it out of paper mache, paper tape, or duct tape, a DIY dress form is an affordable way to create more accurate garments. All you’ll need is a few supplies, a willing model and after a little time and effort you’ll have a realistic dress form for draping, pining, or designing amazing projects.
Share this article on social media or with your sewing circle so your friends and family can make their own DIY dress form too!