
Are you drawn to the unique beauty of wood-burning art, yet are unsure how to begin your own journey into this craft?
Fear not – our pyrography beginners guide has your back! We’ll outline all the equipment and supplies needed for a successful start in creating stunning pieces of décor with lovely wooden designs. Plus – we include tips on making sure each piece turns out perfect as well!
Read on to get started crafting one-of-a-kind masterpieces today.
What exactly is pyrography?
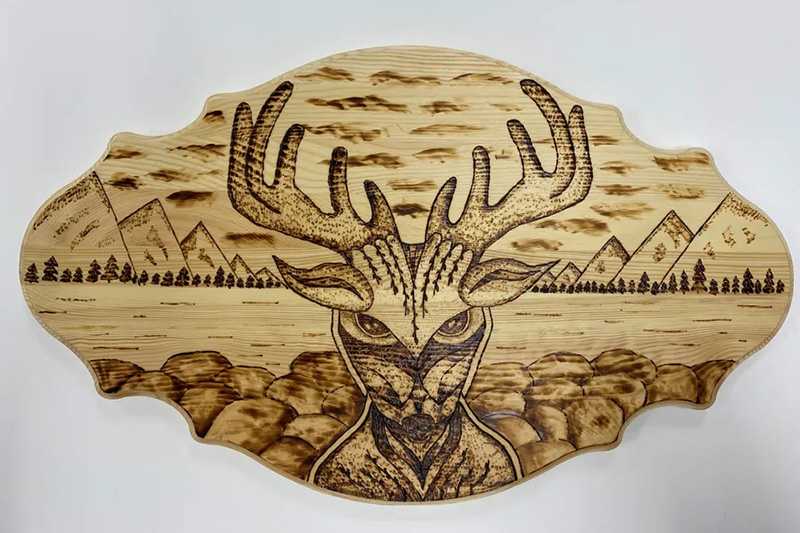
Pyrography is the art of wood burning, and, in simple terms, precisely that: it involves burning intricate patterns and designs into wood. The term comes from the Greek words purr and graphos, meaning “writing with fire”, though nowadays, the art form can involve creating words and all kinds of pictures and motifs.
Pyrography techniques can also be applied to other natural materials, such as leather, gourds, and bone, but this art form is almost always done with wood.
These decorations are typically made with a metal tool resembling a pen, though you could really use any object heated to a high temperature. The earliest recorded pyrography was in China during the Han Dynasty (202 BC – 220 AD), when artisans used irons or pokers heated in a fire to make their designs.
This versatile art form can create various decorations, from simple motifs to complex pieces. You can use pyrography on virtually any wooden object, from furniture and wall hangings to cutting boards, kitchen utensils, and even jewelry.
Is pyrography safe?
Pyrography does involve using tools at high temperatures, and, as such, it is important to observe certain safety precautions.
You can stay safe whenever you’re practicing pyrography by observing certain guidelines.
Be careful to avoid burns
Pyrography tools can reach extremely high temperatures, up to 700 degrees Celsius (1300 degrees Fahrenheit). This means that even momentary contact could result in a serious burn.
Apply the same rules as you would to using power tools or operating heavy machinery: don’t use wood-burning tools under the influence of alcohol or medication that could make you drowsy. Always store your tools out of the reach of children and carefully place them on a stand or holder under your supervision while they cool down.
Don’t inhale fumes
Heating wood can generate smoke and fumes, which can be damaging or even toxic if you inhale them and can also irritate your eyes. Be sure to work in a well-ventilated area, and you should preferably wear a protective mask and safety goggles.
If you don’t buy pre-sanded wood, it’s also important to sand your materials in a well-ventilated area and wear protective equipment, as wood dust can also be hazardous.
Be vigilant of fire risks
As the name suggests, wood burning involves some fire risk. This is not because the wood catches fire when you burn it but rather due to the extreme temperatures the tools reach.
Even when you turn off your tools, they’ll stay very hot for some time, so you must be extremely careful that this doesn’t cause a fire. Always set them on their holder, if they come with them, or a stand that keeps all hot elements away from anything flammable.
Above all, never leave a hot pyrography pen or iron unattended, even if you’ve switched it off.
Be prepared
Accidents can still happen even if you take all the necessary safety precautions. Therefore, you must have a first aid kit on hand in the unlikely event that something does go wrong.
Make sure that the kit is well equipped to treat burns in particular.
Is wood burning safe for kids?
Pyrography involves a range of risks, from burns to smoke inhalation. Although these can be easily managed through a combination of safety measures and equipment, doing so requires a certain level of care and attention.
As such, pyrography is unsuitable for younger children, and children of any age should be closely supervised when wood-burning. While most kids are labeled for ages 12-14 and up, there’s no fixed age when kids can start pyrography: it’s really up to the parents to decide when they’re confident that their child is responsible enough to follow all of the safety guidelines.
Additionally, if you have younger children in the house, educating them on properly handling your pyrography equipment is important, just as you would around any potentially dangerous object.
Tell your kids what your pyrography burner is and that they’re not allowed to touch it – you don’t want to risk a little one finding your equipment, plugging it in and playing around. Of course, you should also store your pyrography pen and other tools safely out of reach of small hands whenever you’re not using it.
What safety gear do you need for pyrography?
You can effectively manage the safety risks associated with wood burning with a few simple pieces of safety equipment:
- A holder or stand for your iron is essential to keep your environment safe while your burner cools down. Most pyrography tools come with their own stand.
- A protective breathing mask should be worn when sanding and can also be extra protection from potential fumes or smoke when burning.
- Safety goggles are also important when sanding.
- Gloves are optional but can be useful to avoid burns or skin irritation from sawdust.
How to get started with wood burning
Pyrography may seem like a complex art form that’s the domain of experts, but even beginners can start with wood burning if they know how. Once you have a few things in place, such as a burner and a suitable wood variety, you can start creating your works of art!
Choose a pyrography burner
You don’t need many tools to start with pyrography, but one is essential. You’ll need a burner such as a pyrography pen or a wood-burning iron; choosing the right one can make all the difference.
The most basic pyrography burners are essentially the same as a soldering iron but have interchangeable wood-burning tips. These are affordable options that will meet the needs of most beginners, though you may want to upgrade at some point as you continue with the craft.
More sophisticated pens include features like an LCD screen showing the temperature or voltage.
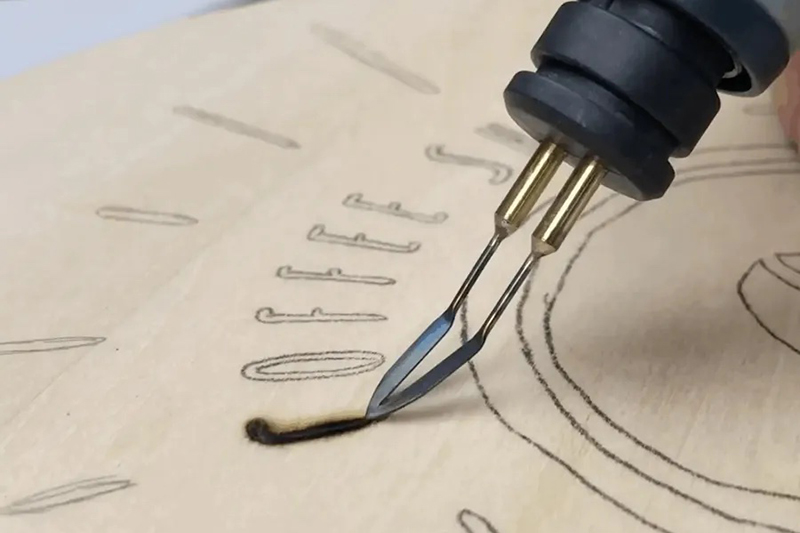
More advanced kits may come with a separate heater box and one or two pyrography pens. Some of these burners have a thin wire tip rather than a solid metal one, which is more efficient and safer, as it heats up and cools down very quickly.
Sets with two pens can be handy depending on the type of art you want to create, as they allow you to alternate between different shaped tips, creating various shapes and effects as you work.
Pyrography pens range widely in terms of cost and complexity, but whatever your requirements, certain features are important to look for:
- Solid-point vs. wire-nib pen – Solid-point pens are generally more affordable, while the wire-nib variety heats up and cools off much quicker and is more flexible and versatile.
- Versatility – Depending on the projects you want to make, you may want a set that comes with various tips and accessories.
- Temperature – Some, but not all, burners allow you to adjust the temperature. This feature is important if you want to work with different types of wood, and especially other materials, or if you plan to create designs with complex shading.
- Ergonomics – It’s important to look for a pen that will be comfortable to use for hours on end. Ergonomic features include the weight of the pen (the lighter the better) and grips made from rubber or other soft materials.
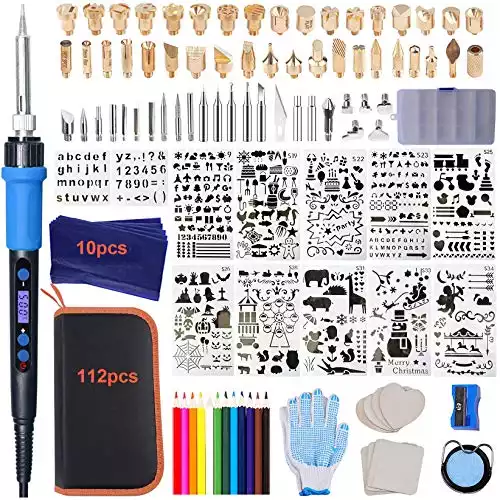
A great burner for beginners is Calegency’s pyrography pen. It comes in an affordable 112-piece woodburning kit, which includes the pen with digital LCD display, stand, burning and embossing tips, soldering tips, and knife chuck and blade set.
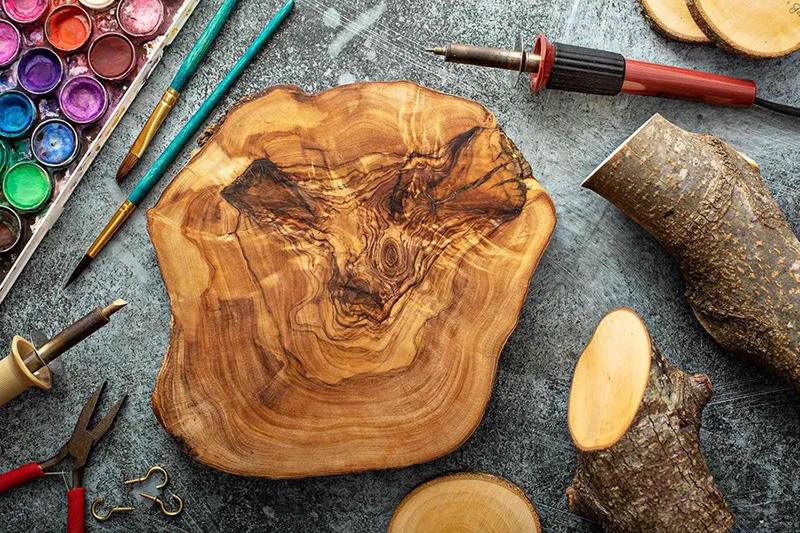
Choose the best wood for pyrography
You can use a range of materials for pyrography – leather, cardboard, and gourds, to name just a few – wood is overwhelmingly the most popular choice.
However, not all types of wood are optimal or even suitable for the art form. Equally, certain woods should be handled differently, so it’s important to know what type of wood you’re working with and understand these differences.
The best woods for pyrography are smooth and fine-grained, such as willow or maple.
Wood with a strong grain pattern, such as rough pine, is not ideal for this art form because the lighter parts of the grain pattern are soft, while the darker patches are harder. Because of this, parts of the wood surface will burn differently, making it difficult, if possible, to achieve a consistent design or motif.
You’ll find that your pyrography burner will dig into the softer patches, leaving ridges and marks, which is not typically what you want in your design! So, always look for a smooth piece of wood with a subtle grain pattern.
You also want to avoid woods loaded with sap and resin, as these can also impact the quality and consistency of the burn, producing an uneven effect.
Most commonly, pyrographers use lighter woods, such as beech or birch, to provide more contrast and make the design stand out. However, you can also use darker woods, like oak or maple, for a different, more subtle effect.
Always use natural wood, as treated, stained, or painted pieces could give off toxic fumes when burned. In the same way, molded and man-made woods like MDF, OSB, and plywood also contain harmful chemicals that can be toxic when burnt.
The EPA also warns against burning driftwood, as this type of material is saturated with salt and may release toxins when heated. Wet, rotten, moldy, or diseased wood should also be avoided for similar reasons, as well as green (not completely dry) wood, as this generates a lot of smoke when burned.
Finally, even natural woods can be harmful: poison oak, poison sumac, poison ivy, oleander, Mexican pepper, and Japanese yew all contain toxins that could be released during pyrography.
Beyond the factors mentioned above, distinct types of wood have their own unique properties and, therefore, behave differently when they burn, just as they do when you paint or stain them. For example, some woods will give a greater range of depth of tones when burned.
It’s a good idea to try different types of wood (other than those to avoid that we listed above) and see how they react to the tools – you can play around with creating different effects.
Here are some excellent woods for pyrography:
- Willow – Though it can be difficult to source, willow is one of the best woods for pyrography, as it is soft and burns quickly and evenly.
- Maple – Although a harder wood than others on this list, maple has a very subtle grain, making it an incredibly smooth canvas for your pyrography.
- Cherry – Another smooth, even wood that is a pleasure to work with, as long as the strong color variations don’t bother you.
- Aspen – This softwood burns quickly with a smooth finish, though it does feature some color variations that may distract from your designs.
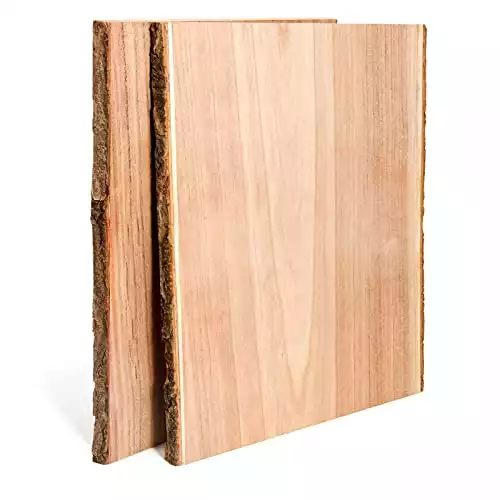
- Basswood – With a relatively smooth and even grain, this wood is easy to work with.
Prep your wood for burning
Depending on the wood you have, you may need to do a fair bit of work to prepare it for burning, while other pieces come pretty much ready to go. Either way, preparing your wood is essential if you want great results – it’s a little extra effort, but it will save you time in the long run!
For most pieces of wood, it’s important to sand them to remove any rough patches, bumps or ridges, because only smooth pieces will burn evenly. Uneven burning makes it almost impossible to achieve consistent effects in pyrography and can mean that finer details get lost.
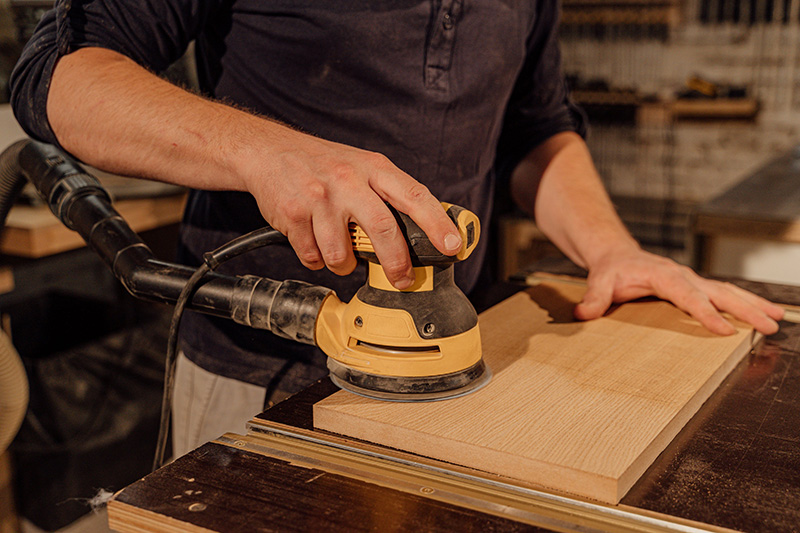
You can either sand your wood by hand with sandpaper, or use an electric sander. The latter is much quicker and easier, though you do need special equipment, as well as carrying more safety risks.
If sanding by hand, it’s important to choose paper with the correct grit: sandpaper that is overly fine will make things unnecessarily time-consuming or may not work at all, while only using rough sandpaper won’t get your piece smooth enough for even burning.
If you have a rougher piece of wood, start by sanding it with sandpaper with grit between 50 and 80, then finish with a finer grit, between 150 and 200.
You can go straight for the fine grit paper for smoother pieces that need to be smoothed over.
In all cases, avoid sandpaper with a grit of 220 or higher, as it can make your wood so smooth that some finishes won’t stick!
Even if you buy a smooth piece of wood that has already been prepped, you should check it first to ensure it’s completely ready for burning. Run your fingers over the wood surface to check for any catches or bumps, and smooth these out with sandpaper.
Finally, clean off any dust or sawdust with a clean, damp cloth.
Create your design
You could either draw your own design or source one online. You’ll find plenty of templates online that you can download from sites like Pyrocrafters and LS Irish.
You don’t necessarily need to download a pyrography-specific design, many general designs and templates will work, like this set on Etsy.
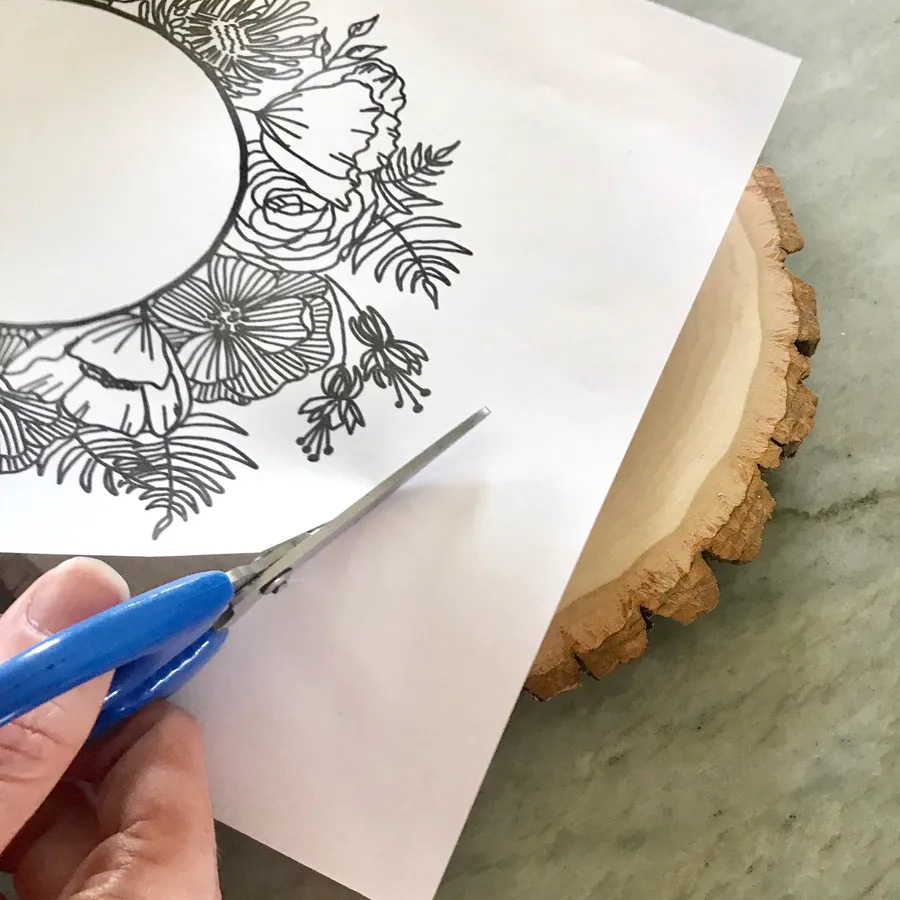
Alternatively, find a particular photo, motif, or picture, print it out, and stencil over it using transfer paper to make your template. This way, you can make a pyrography design from literally anything!
If creating your own design, keep things simple at first. You can choose to incorporate shading, but it may be better to keep things to solid lines and embellishments when you’re first starting out.
Therefore, good designs for beginners are those that can be created with straight and sweeping lines without too much fussy detail. As you develop your craft, you’ll be able to tackle more complex themes, but to start, think about simple shapes like stars and snowflakes.
Alternatively, there are stacks of great designs that you can find online, like this simple mandala or this cute bee wood slice.
This can be a good place to start for beginners, as you won’t need to worry about design elements and can focus on developing your craft.
Transfer your design
Once you’ve got your design, you need to transfer it onto your wood. This is important, as it will allow you to follow your design exactly as you burn the wood.
Very advanced pyrography artists can work freehand, but even professionals almost always transfer their design onto the surface of the wood before they pick up their burner.
There are a range of ways you could transfer your design, but the most common is using carbon paper.
This method is very simple and effective: place a piece of carbon paper over the wood. Put your picture or template on top of that, and trace over the lines with a pen or pencil, applying moderate pressure.
The pressure will transfer the carbon to the wood, marking out your design. Another common technique is to draw your design directly onto the wood with a pencil.
Either way, the graphite or carbon lines will usually burn away as you create your design. However, if there are any left over, you just need to run over them with an eraser, which will remove the marks without touching your artwork.
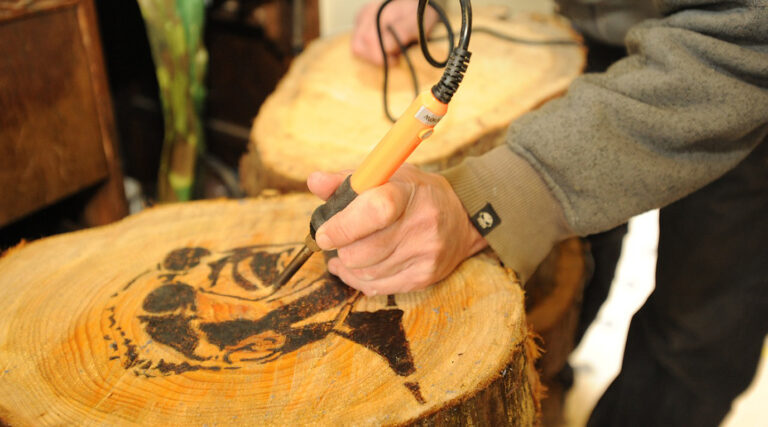
Burn it on the wood
After all of your prep work and design creation, you can finally burn it on to your wood to create a stunning piece of art!
Here’s a step-by-step guide on how to burn your pyrography design into wood:
1. Choose the right tip
Make sure you have the right pyrography tip, and put this on your pen. Almost all tools come with a variety of tips for different purposes and effects, so make sure you have the correct one installed before turning it on.
For example, you’ll want a smaller, more defined tip for edging and lines, but a rounder tip for shading. Be sure to closely follow the instruction manual for your burner so that it is properly installed and on touch the tip if the burner is completely cool and unplugged from the power.
For some tools, you’ll need a screwdriver, for others, it will snap or lock in.
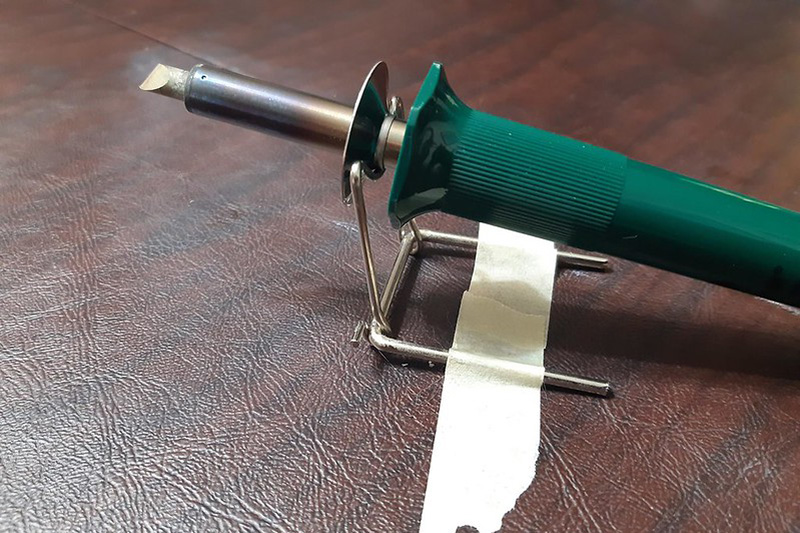
2. Turn on your burner
Place your burner in its stand or holder, then turn it on and wait for it to heat up. Be sure to observe the safety measures mentioned above, keeping the pen in the stand while it heats up.
It’s a good idea to tape, screw, or otherwise fix the stand to your work surface so that it won’t accidentally fall or slide. Most tools take less than a minute to fully heat up, but be sure to check the instruction manual to confirm this for the specific model you have.
5. Start with lines and edging
Take your pyrography pen, holding it in your dominant hand using the tool’s grip – be sure not to touch the metal tip or shaft! With your other hand, firmly grip the piece of wood or wooden object you’re working with to stop it from moving or sliding.
Depending on the art you want to create, you may wish to add shading (see step five below) or just create motifs from lines and embellishments. You may find that this is easier when you’re getting started with wood burning, but most of the principles are the same whether you’re making lines or shading.
You can also add embellishments like dots by briefly pushing the end of the tip into the wood.

4. Adjust the temperature of your burner
This will allow you to achieve different degrees of darkness: lower temperatures will leave a lighter mark, while a hotter iron will create a darker burn in the wood. When filling in shapes and doing shading, it’s usually best to keep your tool on a lower setting, though you’ll sometimes use a hotter tool for darker sections and details.
It makes sense to start with the lighter sections and then turn up the temperature when you move on to the darker ones rather than having to wait for the tip to cool down.
5. Start filling in your design
You could leave your design as is, or you may choose to add shading – it’s up to you!
Depending on the tool and tip you’re using, you may be able to do this as you work at the same time as making your lines and outline, or you may need to change the tip.
As always, let the burner completely cool down and unplug it from the power before changing the tip. If you’re not sure, don’t touch the tip to check!
Instead, you can check whether the tool is completely cool by dabbing it quickly with a damp cloth. Hot metal will sizzle or hiss when exposed to the moisture. You can change the tip with needle-nose pliers, but you should still wait for it to cool down completely.
Working within the edge lines, fill in the shapes by making slow, steady strokes with your burner. Slowly move along the surface, keeping the pressure consistent for an even effect.
This can be more difficult to achieve when working against the grain, but you’ll find this will get better with time.
You want to aim for moderate pressure to make sure you leave a visible mark, without pushing too hard or pausing, as this can cause bumps or defects in your work. When shading, you can also gradually ease off the pressure to fade out the mark.
6. Keep an eye on your burner while it cools
Once you’ve finished your work, put it in its holder, and switch off your pyrography burner and unplug it from the power source. Be sure to keep it in the stand while it cools, and don’t leave the room or leave it unsupervised until it’s completely cool.
As you develop your craft, you can experiment with different temperatures and wattage and the level of darkness that they create. Remember that every wood behaves differently, so may react in a different way to the same temperature compared to another type of wood.
Tip: Play around with making designs on different types of wood, adjusting the wattage to achieve lighter and darker burns. Jot down the numbers displayed on your tool’s LCD screen or control box (if it has one of these) for future reference – the easiest way to do this is to mark them in pencil on the piece of wood itself.
Finish off your design
Although pyrography looks stunning in its most simple form (that is, burned wood), you can also add extra media. This is completely optional, but you can create a variety of different effects this way, and it’s fun to do once you have a handle on the basics.
Options include paint, stains, decoupage, colored ink or pencil, gold leaf, and pressed flowers. However, if you do choose to add any of these additional materials, always, always do so after you’ve finished burning your design.
If you paint, stain, or otherwise embellish your wood and then try to burn it afterward, it will not only destroy your mixed media, but can also give off toxic fumes and even pose a fire risk. So, always burn first and embellish later!
Once your design is complete, the final stage is to seal it to preserve your artwork. This is particularly important for any items that are going to be regularly used, such as wooden cutting boards, bowls, or spoons, as the work could be rubbed or washed off.
However, all pyrography designs can fade simply due to the passage of time, so it’s important to seal them into the wood. This will also protect it from cracking because of temperature and moisture changes.
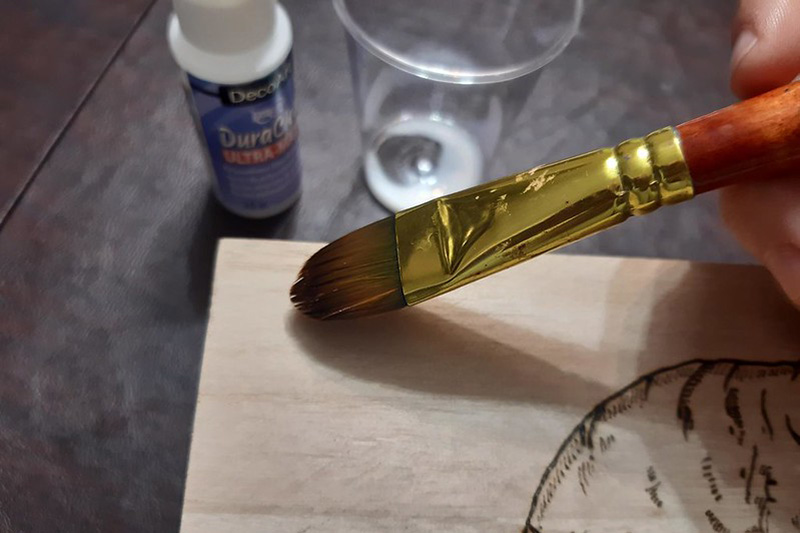
To do this, coat your finished artwork with a sealant such as spar urethane, polyurethane, or polycrylic. These sealants usually come in liquid and spray varieties, so you’ll need to either spray or paint them on with a broad brush, depending on the manufacturer’s instructions.
If your piece needs to be food-safe, you’ll need to use a combination of an oil such as mineral oil or walnut oil, and a water-proofing conditioner like beeswax or food-grade carnauba wax.
For some inspiration on how you can mix other media with pyrography, take a look at this stunning foil and wood-burning project or this biohazard mandala timelapse.
Final thoughts
Pyrography is an ancient art form that can create stunning designs and even life-like pictures burned into wood. Given the safety risks and complex equipment required, this craft can seem pretty intimidating, and you indeed need to be aware of certain things, like key things to keep in mind when buying a burner and safety measures to follow.
However, once you build this knowledge and start exploring the craft, you’ll discover how much fun it can be! As a beginner, you’ll start with simple designs created with basic techniques. Still, before long you’ll be able to incorporate more complicated effects and perhaps even some mixed media for stunning results.
If you’ve enjoyed this pyrography beginners guide and are ready to get started, take a look at our recommendations for the best wood-burning kits.