Have you ever looked at the stunning designs created by tapestry crochet and wondered, “how on earth did they do that”? Read on to find out: we’re going to break down the process so that even absolute beginners can make their own tapestry crochet.
What is tapestry crochet?
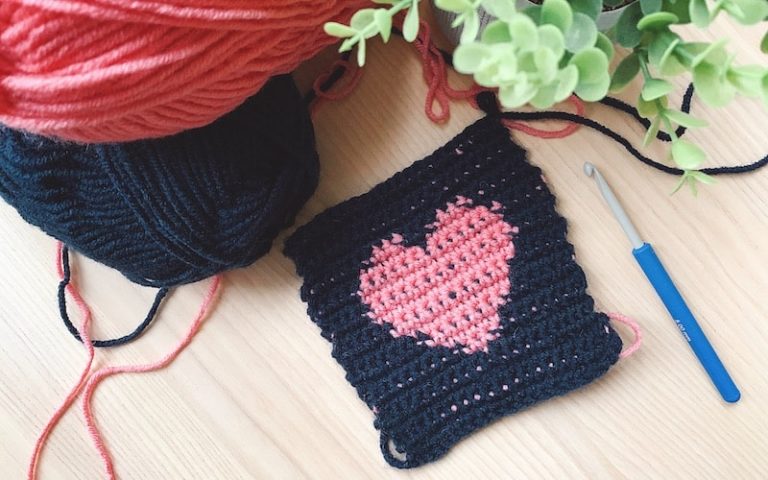
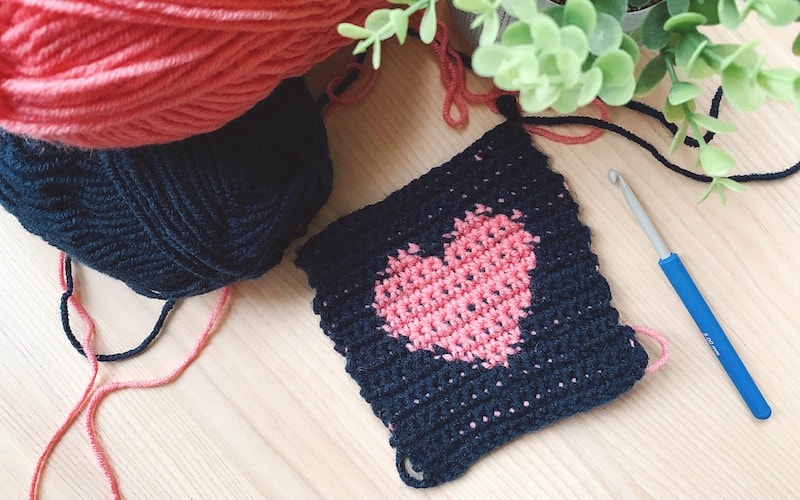
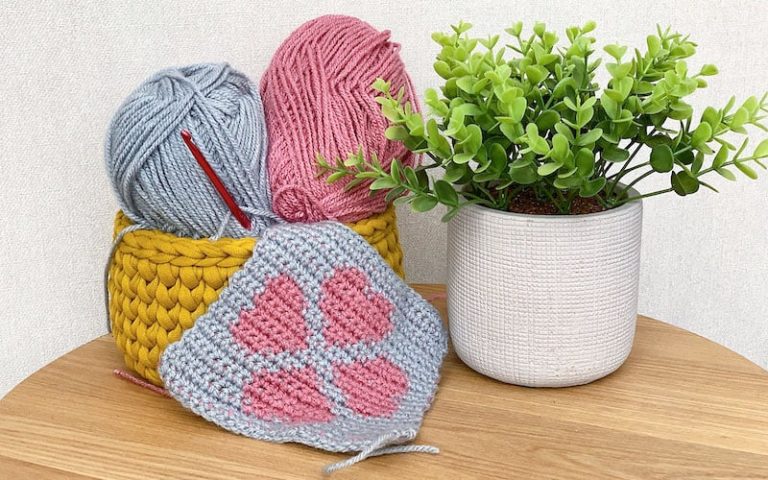
Tapestry crochet is a particular style of crochet used to create designs or pictures in yarn, similar to traditional tapestry. Whereas tapestry is created by weaving threads together on a loom, tapestry crochet is made using single crochet stitches.
By crocheting stitches in a very particular pattern using two or more different colors of yarn, you can create stunning pictures. Tapestry crochet is extremely versatile – there are so many free tapestry patterns you can work with it.
These designs can look very complex and difficult to execute, but tapestry crochet is actually pretty easy to do. In fact, it is a very simple technique of working single crochet back and forth in rows.
Step-by-step guide to tapestry crochet for absolute beginners
Tapestry crochet can seem intimidating if you’ve never tried it before. However, it is actually pretty easy to do if you know how.
Below, we’ll break down the process step by step.
Step 1: Gather your materials
You can complete a basic tapestry crochet with just a few supplies.
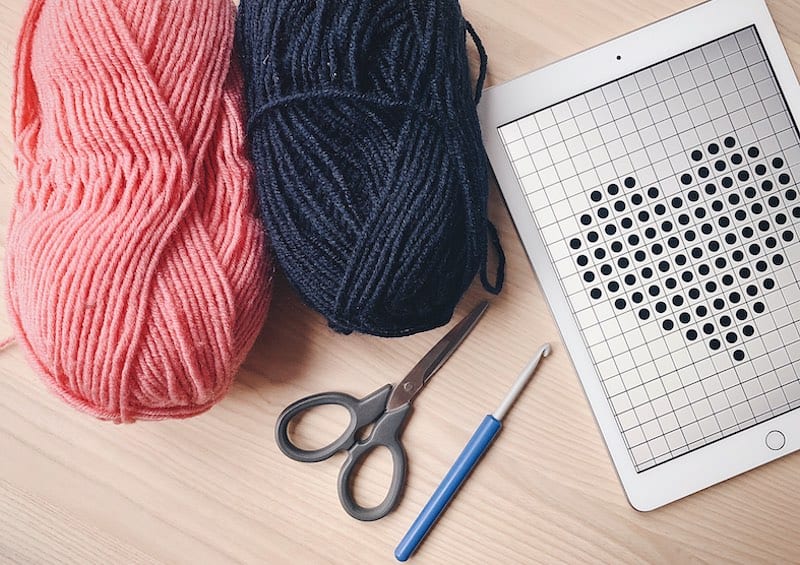
You will need:
- Crochet hook (we recommend a 7mm crochet hook for beginners)
- Simple pattern
- Yarn in two different colors (we recommend a heavier size 5 yarn for beginners)
- Embroidery scissors
Step 2: Check your pattern
You’ll first need to know how to read the pattern for the tapestry crochet you’re going to make. Tapestry crochet patterns are made on a grid, with each square on the grid representing a single crochet.
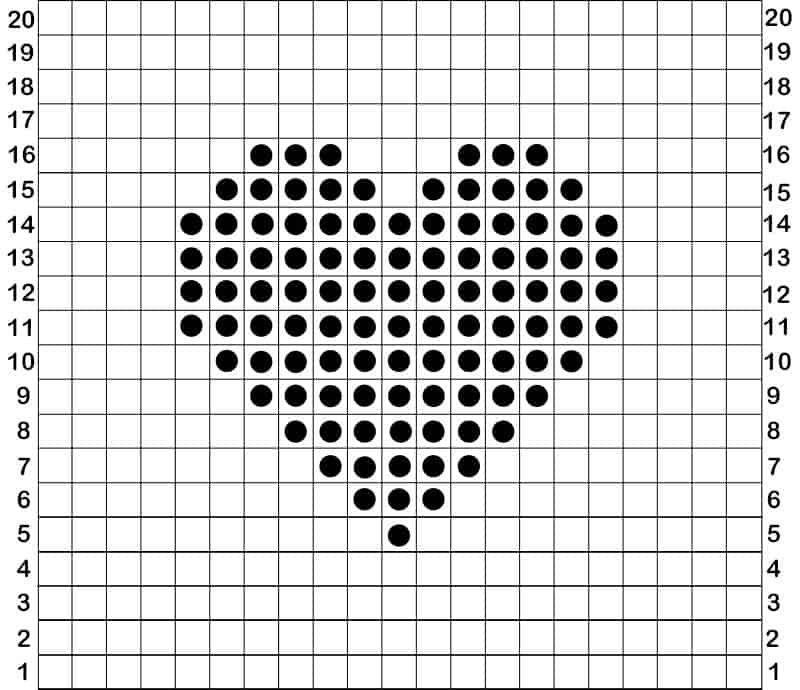
You will work the pattern back and forth in rows, changing yarn color when indicated in the pattern. For most patterns, you can start in any corner and then work each row from there.
Step 3: Chain your first row
Once you’ve decided on your starting point, take a look at the first row of the pattern. As this is the border of the design, the whole row will be the same color in most cases.
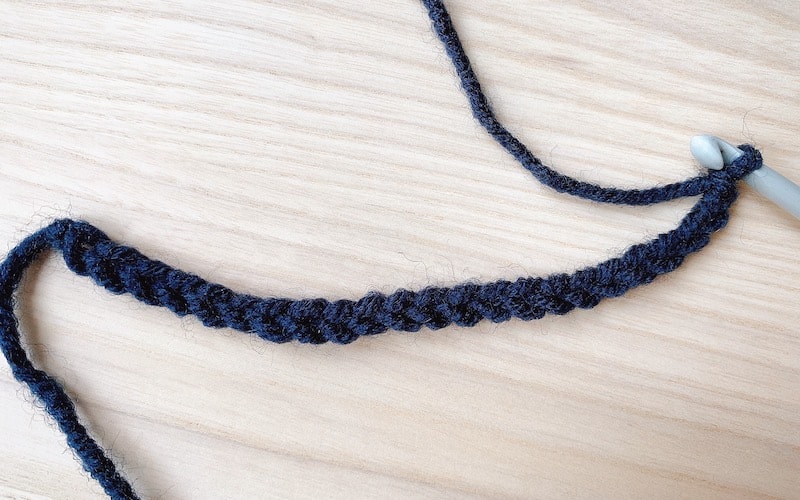
For example, if you are working a design with blue as the base color, the first row of your pattern may show 21 squares of blue. In this case, chain 21 stitches in blue yarn, with a single crochet in every chain stitch.
For tapestry crochet, you should count the stitch next to the hook as a single crochet.
Step 4: Carry your second color yarn
Before you get to the part of your design that uses your second color of yarn, you’ll need to start “carrying” that yarn, so it is ready to use.
To carry your second yarn, simply lay it over your work, at the top of your row of stitches, and crochet over the top. As you chain each stitch, the second yarn should sit close to the previous stitch, allowing you to work around it as if it wasn’t there.
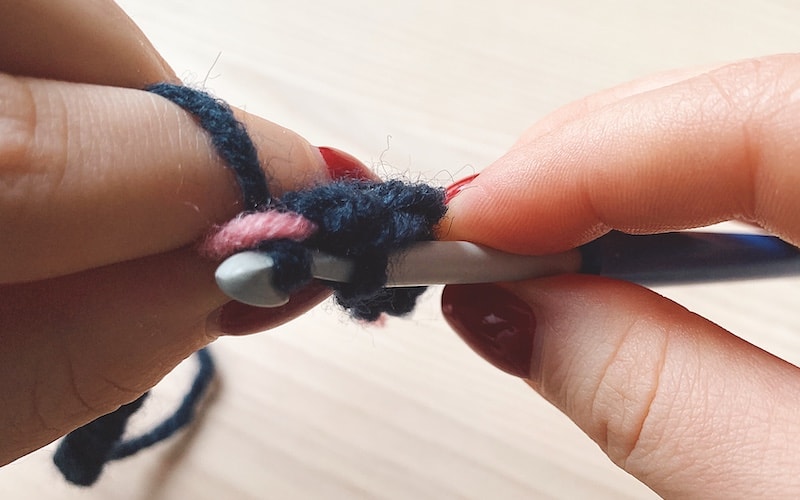
Chain your second row with a single crochet in the chain from the row below, carrying the other yarn as you work. The second yarn will be mostly hidden inside your chain, with just a little of the color visible through the stitches.
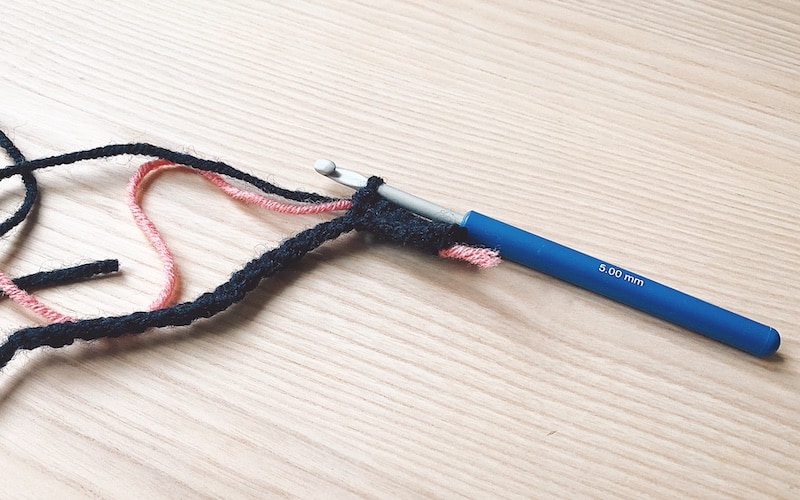
For this reason, it is a good idea to start carrying the yarn from the second row even if you don’t need to use the second color yet so that the overall appearance of the tapestry is consistent.
Step 5: Chain a new row
When you come to work a new row, continue to carry the second yarn. Lay the second yarn over the top of your active yarn to bring it to the back, then chain one and turn.
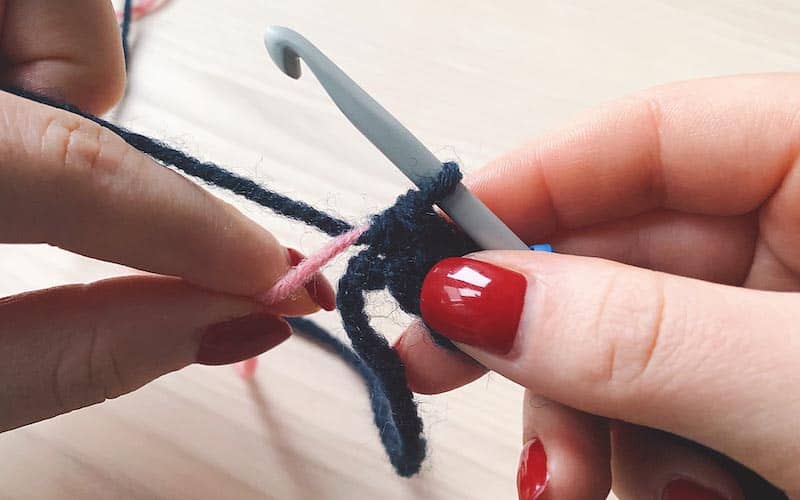
Again, the first chain you make as you turn to begin a new row will count as the first stitch in your pattern. Continue to work the row carrying your second thread as before.
Step 6: Work your pattern
When you reach a square in your pattern that indicates the second color, change your yarn color by inserting your hook through as normal, but then picking up the second color yarn and pulling that yarn back through as normal.
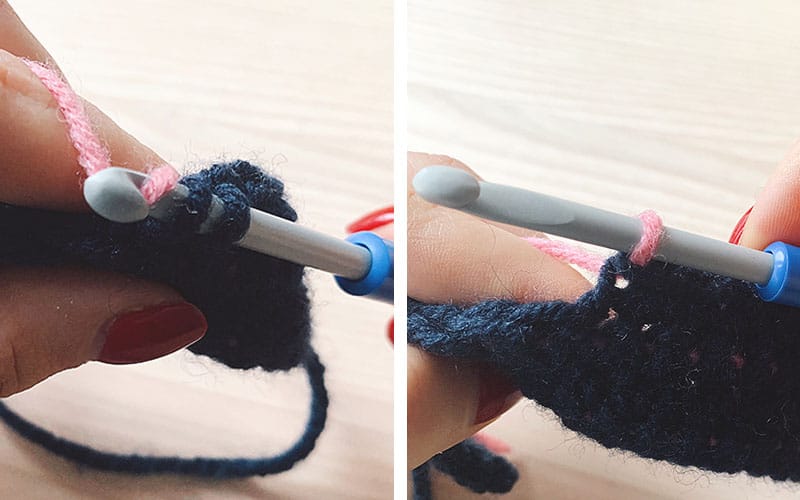
Depending on your pattern, you might then do the next stitch with your secondary color, or go back to working in your primary color. Either way, continue to single crochet, and put the correct color of yarn over the hook while carrying the other yarn as you work.
Step 7: Continue with the design
Continue to work the subsequent rows, following your pattern and switching between yarn colors in the same way as before. The whole time, you will be working in one color and carrying the other yarn.
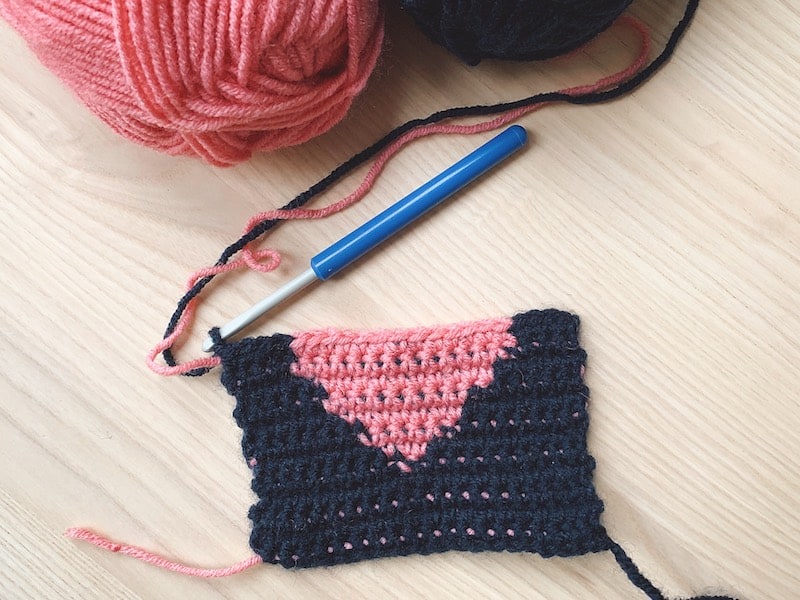
Remember that you need to work the rows of your pattern back and forth. For example, if you work the first row left to right, then you should work the second row right to left, and so on, counting the stitches accordingly.
It can be helpful to mark each row on your pattern with arrows, so you can make sure you work the rows in the right order and the right direction! On the other hand, if you are an experienced crocheter and prefer to work your design in the round, you won’t need to worry about working the rows back and forth as you will always be chaining in one direction.
Step 8: Finish your pattern
Continue to work each row back and forth, with a single crochet in each chain stitch. When you reach the final row of the design, complete the row according to the pattern.
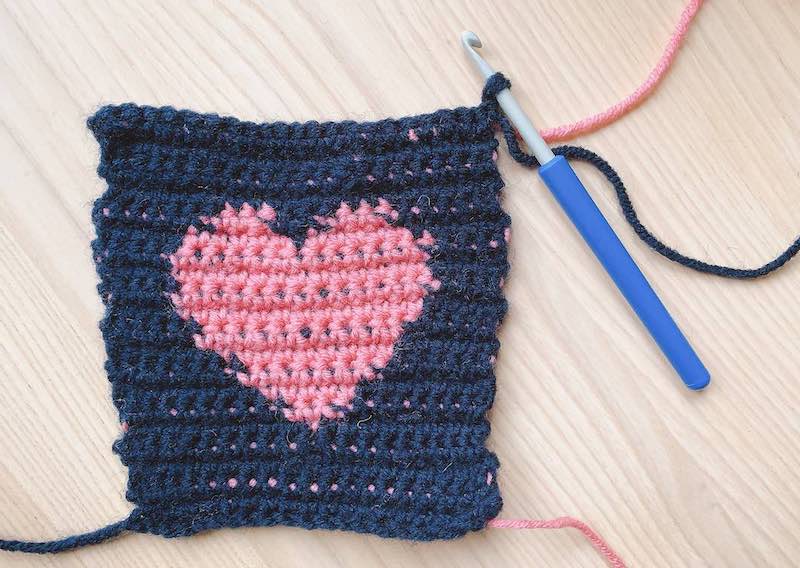
Once you have completed the last stitch on your final row, cast off by cutting your yarn about three inches from the final stitch and pulling it all the way through your last stitch.
You can weave the thread tail through your final row to keep it secure and hidden.
Top tips for tapestry crochet
Tapestry crochet is much easier to do than you might think. In fact, it is simple enough that even absolute beginners can give it a go.
Having said that, there are certain tips and tricks that will make tapestry crochet easy to do, and greatly improve your results:
Use a simple pattern
You can find a simple pattern online or plot out your own design on graph paper. If designing your own pattern, remember that each square on the graph paper represents one stitch.
Simple shapes like circles, triangles, and hearts with plenty of background space (at least two rows of background color on each side of the design) work best.
Stick to two colors
Choose or design a pattern that only uses only two colors at first. As you get more confident, you can work with more complex designs, such as three or more colors – carrying two or more different yarns as you work your pattern.
Begin each row the correct way
In crochet, every design has a right side and a wrong side, even though the pattern is reversible. This is critical to your work, as you hold the second yarn behind the work when starting a row on the wrong side, and in front of your work when starting a row on the right side.
Therefore, make sure that you decide which is the right side and which is the wrong side of your project, and be consistent in how you apply it.
Practice under and over
In classic crochet technique, the yarn over method is typically used: this means that the yarn is brought from the back and goes over the hook. In the yarn under method, the yarn comes around the front and is brought under the hook.
Some tapestry crocheters prefer the yarn under method because they say this creates a sharper color transition and has less slanting in the design. Why not try each and see which you prefer?
Do a trial run (or several)
Although tapestry crochet is relatively easy, it does take a bit of practice to master. Start with one or two practice swatches to get the hang of the techniques involved.
Once you feel comfortable with the specific techniques used in tapestry crochet, you can start working on specific items such as accessories and home décor items.
Keep your yarn separate
One of the most crucial aspects of tapestry crochet is choosing the right yarn at the right time in order to create the perfect pattern. Keeping your workspace organized will go a long way to avoid yarn tangling and keep your work in good order.
Use variegated yarn
Using a variegated or self-striping yarn instantly adds something special to your design. In particular, using a variegated yarn as the secondary color with a plain yarn as the primary color makes it look complex and interesting.
Wrapping up
Tapestry crochet can look very complex, with stunning patterns and life-like designs created by rows of stitches. However, this art form is actually relatively simple: all you need is basic crochet technique and a pattern.
With a little know-how and a bit of practice, you can create your own patterns and designs simply using single crochet.
Do you know other crocheters who’d love to give tapestry crochet a go? Share this article with your friends, family and fellow crafters so they can embrace this deceptively-easy technique.

