As much as we love our kindles and other digital devices, nothing beats the feeling of a good book in your hands.
Physical books are far from dying out, and so bookmarks are still essential items – so why not use a cute DIY photo bookmark that will not only hold your place in your novel but also bring a smile to your face?
Best DIY Photo Bookmark Tutorials
Photo bookmarks are a fantastic, personalized item to remind you of special people, places, or as a truly personal gift for family or friends.
You can use photos of your children, memorable times with your friends, your travels, or beautiful artwork you love – the possibilities are endless, and the choice is yours!
We’ve rounded up the best and easiest DIY photo bookmark tutorials – most of which you can make in minutes with just a few simple materials.
Looking for more DIY tutorials? Check out our list of DIY necklace tutorials.
1. Double-sided personalized photo bookmark
We love that these DIY photo bookmarks are double-sided – so you can enjoy cute photos no matter what side up the bookmark is. Plus, this allows you to fit more photos when you’re having trouble deciding which photos of your kids, pets or best buddies to include!
The bookmarks are made with scrapbook paper (and photos of course) with a yarn tassel for an extra decorative element.
The tutorial suggests using a paper cutter and while this makes things easier, if you don’t have one you can use scissors instead. Other than that, all you’ll need is a glue stick and a hole punch for the tassel, and you’re good to go!
The written tutorial lays out the process step-by-step, including explaining how to make the yarn tassel. Ready to make your own double-sided photo book marks? Check out the tutorial here.
2. Decoupage photo bookmarks
This project is a bit more involved (and may get a bit messy!) as it involves ink and decoupage glue. You’ll make a full-photo bookmark on a sturdy balsa wood base.
Decoupage techniques do take a bit of practice, but this is a good entry-level project to try your hand at this craft if you have never tried it before. The ink is optional, but creates a nice effect on the edges of the bookmark.
You’ll also need to have a craft knife and know how to use it, meaning that this project is not kid-friendly. You can follow the video step by step to create your own version of this fun decoupage project.
3. DIY photo bookmarks with burlap and Mod Podge
For a crafty twist on DIY photo bookmarks, try this idea! These bookmarks are made with a burlap base and fabric top that gives them a truly hand-made look.
Simply print the photos on Iron-On transfer paper, which can then be easily ironed onto gauze or other lightweight fabric. This creates a unique vintage look as your photos are visible through the fabric, and you can play around with this effect by using different types of see-through fabric, with various textures and patterns.
This does make this project a bit more complex than others on this list because you’ll need both iron-on transfer paper and a printer capable of handling it.
The bookmarks are finished using Mod Podge to seal everything in and prevent fraying. Take a look at the illustrated step-by-step tutorial here.
4. Cut-out “hanging” photo bookmarks
These super cute bookmarks have a fun new take on DIY photo bookmarks – the photos are cut out and laminated so that the whole bookmark is person-shaped. For the full effect, take photos of your kids posed as if they’re hanging mid-air, so it looks like they’re hanging from the bookmark’s string.
If you place the yarn in just the right spot, your kids really look like they’re hanging from the yarn! You can even color-coordinate the yarn with your little one’s outfit in the photo.
You won’t need a laminator to make these cute bookmarks – the tutorial explains how to “laminate” the photo using contact paper. They also have the handy suggestion of having your kids pose in front of a white sheet to cut down on the amount of ink used if you’re printing the photos yourself.
This will make a nice sturdy bookmark that will protect the photo and decorate your books for years to come! Check out the full written instructions here.
5. Kids photo bookmarks
This is another version of the “hanging” photo bookmarks featured in the previous tutorial. The video walks you through the process of making cute photo bookmarks where your kids again look like they’re hanging from the bookmark’s string.
One key difference is that this tutorial uses a laminator to finish the bookmarks rather than contact paper. If you don’t have a laminator, you could go to your local mailbox or office supply store and ask if they do laminating.
This version also adds stickers on the end of each of the bookmark’s strings for an extra, super cute detail.
Watch the video here for a different take on cute hanging kids’ photo bookmarks!
6. Easy DIY photo bookmark
This project is perfect for little hands, being fun and easy to make with no tricky tools or techniques. All your kids will need are some scissors, a hole punch, card stock, a photo, ribbon, a ruler, and glue, and they’ll be able to make a cute bookmark as a gift for their parents or grandparents, or just for themselves!
Your kids will measure and cut out a frame in the cardstock and then glue the photo behind, before placing another piece of cardstock for the back and gluing it all together. To finish, all they need to do is punch a hole near the top and insert the ribbon.
This simple design can also be adapted by changing the size and shape of the frame, or of the bookmark itself. You can even add additional photos, to make the double or triple photo bookmark.
Follow along with the video here.
7. DIY photo strip bookmark
This beginner-friendly project is quick and easy to make – so much so you can even get your kids involved! You’ll only need a few basic supplies – cardstock, glue, ribbon and of course some digital photos – so this is something you may even be able to whip up with what you already have in your craft cupboard!
The bookmarks are made with a strip of four photos. The tutorial suggests using four photos taken in succession or on the same day, which creates a visual story.
Though, of course, you can use any set of four photos you like!
You’ll also need to crop and edit your photos using computer software. However, the tutorial walks you through how to do this on PowerPoint, so don’t worry if you’re technically challenged!
This written tutorial walks you through how to make these easy bookmarks step by step.
8. Cut-out photo bookmarks
In another take on the photo bookmark idea, this project uses printables that are cut out with the faces from the photos put inside. So you can have your child’s smile beam out from the center of a cartoon daisy, for example, or put them inside an astronaut suit.
You can download the printables for free on education.com or check out sites like Chicfetti for more printables.
Once downloaded and printed, you’ll just need to cut out the printables, cut around shapes and cut out your photos to fit. You can then have the fun of coloring in the frames with a sharpie, paint or pencils, and finish by punching a hole near the top and tying some yarn (optional
This is another fantastic one for kids, as these bookmarks are easy to make, not to mention super fun to color in and personalize.
Video tutorial demonstrates every step to show you how to make your own cut-out DIY photo bookmarks.
9. Laminated DIY photo bookmarks
This tutorial focuses on how to laminate your photo bookmarks once you’ve made the base. You can use the above tutorials as a guide to making the bookmark itself, or let your creativity run wild!
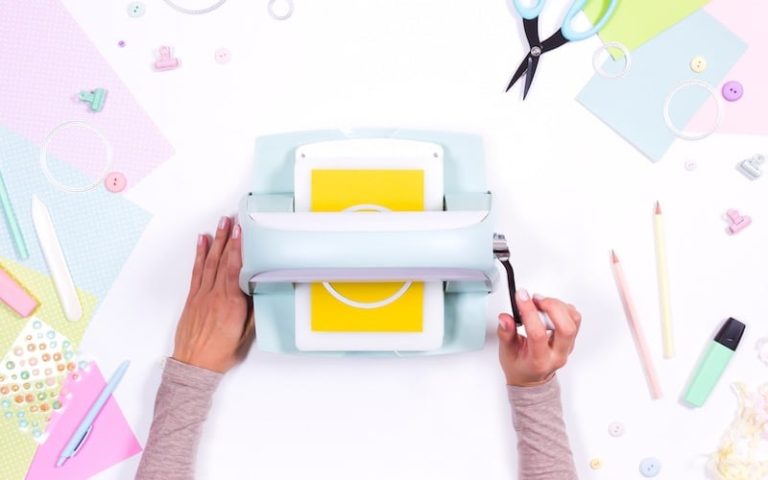
Once this is done, follow the video to learn how to use a laminating machine to laminate your own beautiful DIY photo bookmarks. The video also features handy tips like how much space to leave around your bookmarks and how to avoid bookmarks shifting as you’re working.
For better results with your laminated bookmarks, take a look at the video here.
Why make photo bookmarks?
When digital e-readers started to gain popularity a few years ago, many people predicted this would be the end of good old paper books. However, books have stood the test of time, with many people still preferring to hold a physical book in their hands.
Bookmarks are essential for keeping your place without needing to fold down the corners or otherwise damage your precious books. Photo bookmarks are a fantastic idea because they are an easy, fun, and very personalized project.
With digital cameras and smartphones, we all have a large number of photos readily available, and social media is also a great resource for finding nice photos.
Bookmarks featuring photos of your kids also make great gifts on Mother’s and Father’s Day for grandma and granddad, as well as cute stocking stuffers for the holidays.
And, of course, a bookmark is always the perfect present for anyone who loves to read! You can even give the bookmark along with a gift card for books to your favorite bookworm.
Things to watch out for when making DIY photo bookmarks
When making your DIY photo bookmarks, don’t underestimate the critical first step of the process – printing the photos yourself. The quality of your bookmarks can only be as good as the photos themselves, so play close attention to the paper you use and the print quality of your photos.
If you don’t have a high-quality printer or access to proper photo paper, it may be worth having the photos professionally printed for best results.
If making “hanging” photo bookmarks, be sure not to glue down the hands and arms until the end. Otherwise, you won’t be able to attach the yarn so that it looks like your kids are really hanging off the end.
For decoupage photo bookmarks, make sure to line up the edges perfectly and smooth out any air pockets under the photo to avoid bubbles or bumps on the finished project.
Finally, if you laminate your bookmarks, it is important to leave enough space between each on the laminating sheet to be able to cut out the border. You need to leave at least a quarter inch between each bookmark for an 1/8 inch border.
It’s also important to place the bookmarks carefully, to avoid them shifting as you close the laminating sheet as they won’t be glued down yet.
Are DIY photo bookmarks a kid-friendly activity?
One of the best things about DIY photo bookmarks is that most are so easy to make that you can get your kids involved too. Making photo bookmarks is a fantastic rainy-day activity that will keep your little ones occupied while letting them tap into their creative side.
As an extra bonus you’ll encourage your children to cultivate a reading habit because they’ll be dying to use their cute, personalized bookmarks.
Of course, always make sure to supervise your children when using scissors and other hazardous objects, and have them use safety scissors if possible!
For another more kid-friendly craft activity, check out our felting for kids guide and a selection of easy egg decorating ideas.
Wrapping up
DIY photo bookmarks are not only fun and easy to make, but they also make a fantastic, personalized gift for friends and family.
Whether you’re looking to whip up some quick presents for Mother’s Day or the holidays, or want to keep your kids occupied on a rainy day while encouraging them to get into reading – these tutorials are perfect! These projects range from super easy to a bit more complex, and some you can make with just a few basic supplies that you probably already have on hand.
So what are you waiting for? Get crafting!
If you found this round up of the best DIY photo bookmarks useful, why not share it with your crafty friends on social media?

